Flooring standards, classifications and your rights
111 entries, each one checked against its primary source and quoted from it. Where a figure appears, the figure is the one the source gives. Where the only sources are manufacturers rather than a standard, the entry says so.
Product standards
Which published standard a floor is made to, and what that standard covers.
BS EN 13489 — multi-layer parquet
BS EN 13489 is the product standard for multi-layer parquet elements, setting out their characteristics, requirements and test methods for internal use as flooring.
“This document specifies the characteristics, requirements and test methods of multi-layer parquet elements for internal use as flooring.”
Source: BS EN 13489:2023 - Wood-flooring and parquet. Multi-layer parquet elementsMulti-layer parquet: a top layer of at least 2.5 mm
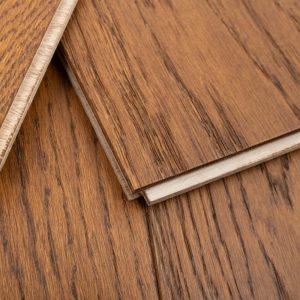
EN 13489, the product standard for multi-layer parquet, defines multi-layer parquet as a wood flooring system of laminated construction with a solid wood top layer of at least 2.5 mm, and requires the top layer never to be thinner than 2.5 mm, whatever the production deviation.
| Minimum top layer thickness, multi-layer parquet (EN 13489:2023, 3.1 and Table 1) | 2.5 mm |
|---|
“wood flooring system of laminated construction with a solid wood top layer of at least 2,5 mm thickness … Due to process in production, the deviation of declared top layer thickness can be ± 0,2 mm but the thickness shall be never less than 2,5 mm.”
Source: EN 13489:2023 - Wood-flooring and parquet - Multi-layer parquet elements (SIST preview of the standard, clause 3.1 Terms and definitions, clause 4.1.3 Dimensional characteristics)Why a cross-laminated board moves less
EN 13489, the product standard for multi-layer parquet, notes that the cross laminated construction minimises the possibility of the wood moving, shrinking and swelling, under changing climatic conditions.
“The cross laminated construction minimizes the possibility of the wood to move (shrink and swell) under changing climatic conditions.”
Source: EN 13489:2023 - Wood-flooring and parquet - Multi-layer parquet elements (SIST preview of the standard, clause 4.1.1 General, Note 1)What laminate is made of, and what EN 13329 says about thickness
EN 13329 defines laminate flooring as a rigid floor covering with a multiple layer structure, its core usually particleboard, MDF or high density fibreboard (HDF, at least 800 kg/m³) and a backer that balances and stabilises it; it sets thickness only as a tolerance of 0.50 mm against the nominal value, and classifies every laminate for levels of use by the requirements of its Table 2.
“rigid floor covering, typically in a plank or tile format, with a multiple layer structure: e.g. backer, substrate, décor and worked edges that allow the product to be joined together to form a larger integral unit … It is generally a particleboard, as defined in EN 309, or a dry process fibreboard (MDF) as defined in EN 316 or a so called High Density Fibreboard (HDF) which is a MDF-board with a density ≥ 800 kg/m3. … layer opposite to the surface layer used to balance and stabilize the product … Thickness of the element, (t) without underlay Δtaverage ≤ 0,50 mm, relative to nominal value … All laminate floor coverings shall be classified as suitable for different levels of use according to the requirements specified in Table 2, when tested by the methods given therein.”
Source: EN 13329:2016+A1:2017 - Laminate floor coverings (SIST preview of the standard, clauses 3.1 and 3.3, Table 1)Moisture content at delivery — what EN 13489 requires
EN 13489, the product standard for multi-layer parquet, requires the moisture content of the elements to be between 5 % and 9 % at the time of first delivery, measured by the oven-dry method of EN 13183-1. The corresponding figure for solid parquet under EN 13226 was not available from a source we could read, so it is not stated here.
| Moisture content at first delivery, multi-layer parquet (EN 13489:2023, clause 4.1.2) | 5-9 % |
|---|
“The moisture content shall be between 5 % and 9 % at the time of the first delivery of the product.”
Source: EN 13489:2023 - Wood-flooring and parquet - Multi-layer parquet elements (SIST preview of the standard, clause 4.1.2 Moisture content)BS EN 14342 — wood flooring and parquet: characteristics and marking
BS EN 14342 defines the characteristics, requirements and test methods for flat-surface wood flooring and parquet used as internal flooring, and sets the evaluation-of-conformity and marking rules for these products.
“BS EN 14342 defines and specifies the relevant characteristics and requirements of flat surface wood flooring products and parquets as well as the appropriate test methods for determination of their suitability for use as internal flooring, including fully enclosed public transport premises.”
Source: BS EN 14342:2013 - Wood flooring and parquet. Characteristics, evaluation of conformity and markingBS EN 13226 — solid parquet elements
BS EN 13226 specifies the characteristics of solid parquet elements with grooves and/or tongues intended for internal use as flooring, covering elements with or without surface treatment.
“This European Standard specifies the characteristics of solid parquet elements with grooves and/or tongues for internal use as flooring. This standard is not applicable to panels made from elements for which a separate standard is in course of preparation.”
Source: BS EN 13226:2009 - Wood flooring. Solid parquet elements with grooves and/or tonguesHerringbone and chevron — what the two patterns are
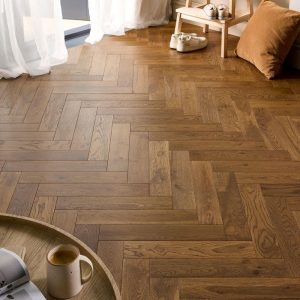
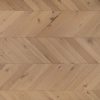
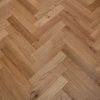
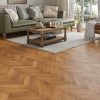
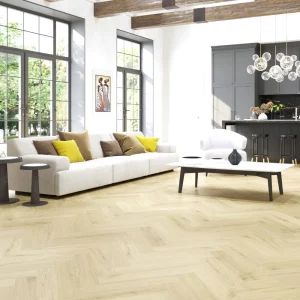
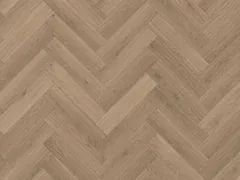
Herringbone is laid from rectangular blocks whose ends are cut square: set at right angles to each other and staggered, so that the end of one block meets the side of the next and the pattern reads as a broken zigzag. Chevron blocks have their ends cut at an angle - typically 45 or 60 degrees, depending on the manufacturer - so the ends meet on a continuous line and form a V. No published standard we could read defines the two patterns; the definitions here come from manufacturers and agree with each other.
| Herringbone: angle between adjacent blocks | 90 degrees |
|---|---|
| Chevron: typical end-cut angle (manufacturer-dependent) | 45 or 60 degrees |
“Herringbone flooring features rectangular wood planks arranged in a staggered zigzag pattern. Each plank meets the next at a 90-degree angle. In chevron patterns, the wood planks are cut at an angle, typically 45 or 60 degrees, so they meet in a continuous V-shape.”
Source: Havwoods - Herringbone vs. Chevron: Which Parquet Style Suits Your Space Best? · second sourceBS EN 13329 — laminate floor coverings
BS EN 13329 specifies the characteristics, requirements and test methods for laminate floor coverings with a surface layer based on aminoplastic thermosetting resins, including requirements for marking and packaging. It also contains a classification system based on EN ISO 10874 for areas and levels of use, and it does not cover areas subject to frequent wetting such as bathrooms, laundry rooms or saunas.
“BS EN 13329 specifies characteristics, requirements, and test methods for laminate floor coverings with a surface layer based on amino plastic thermosetting resins. BS EN 13329 specifies requirements for marking and packaging.”
Source: BS EN 13329:2016+A2:2021 | 31 Oct 2021 | BSI KnowledgeBS EN 16511 — modular mechanical locked floor coverings
BS EN 16511:2023 specifies characteristics, requirements and test methods for multilayer mechanically locked modular floor panels with a wear-resistant decorative surface layer, supplied as tiles or planks for floating installation in domestic and commercial use.
“This document specifies the characteristics of multilayer mechanical locked floor covering with a wear-resistant and decorative surface layer supplied in panels (either tile or plank form). The floor panels are considered suitable for domestic and commercial levels of use and designed for floating installation.”
Source: BS EN 16511:2023 - Modular mechanical locked floor coverings (MMF). Specification, requirements and test method for multilayer modular panels for floating installationISO 10582 — heterogeneous poly(vinyl chloride) floor coverings
EN ISO 10582 specifies the characteristics of non-cushioned heterogeneous (multi-layer) PVC floor coverings in tile, plank or roll form, while EN ISO 10581 covers homogeneous PVC floor coverings in tile or roll form; both include a classification by intensity of use referring to ISO 10874 and requirements for marking.
“ISO 10582:2017 specifies the characteristics of non-cushioned, heterogeneous floor coverings, consisting of poly(vinyl chloride) (PVC), supplied in either tile or plank or roll form.”
Source: ISO 10582:2017 - Resilient floor coverings - Heterogeneous poly(vinyl chloride) floor covering - Specifications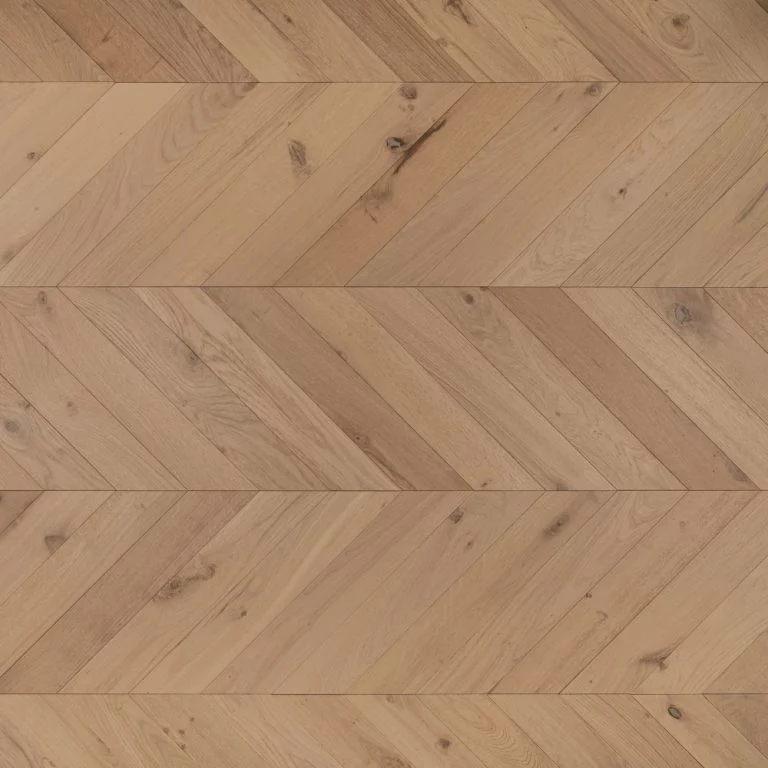
Classification and grading
The numbers on the pack: use class, abrasion class, wear layer thickness.
EN ISO 10874 — use classes
EN ISO 10874 sets out a classification of floor coverings by area and intensity of use; the classes are 21, 22 and 23 for domestic use, 31 to 34 for commercial use and 41 to 43 for industrial use.
| Class 21 | Domestic moderate/light |
|---|---|
| Class 22 | Domestic general/medium |
| Class 23 | Domestic heavy |
| Class 31 | Commercial moderate |
| Class 32 | Commercial general |
| Class 33 | Commercial heavy |
| Class 41 | Industrial moderate |
| Class 42 | Industrial general |
| Class 43 | Industrial heavy |
“In EN ISO 10874 a classification system for different use classes is described, with references to the relevant product standards.”
Source: How to use the Floor Covering Standard Symbols (FCSS) — EUFCA, symbols per EN 15398AC1 to AC6 — abrasion classes for laminate
EN 13329 classifies the abrasion resistance of laminate floor coverings in abrasion classes AC1 to AC6. The EPLF's own Environmental Product Declaration for DPL laminate floor covering states the property "Abrasion Class EN 13329" with the value range AC1-AC6.
| Abrasion classes under EN 13329 | AC1-AC6 |
|---|
“Abrasion Class EN 13329 | AC1-AC6 | -”
Source: Environmental Product Declaration - Direct Pressure Laminate Floor Covering (DPL Floor Covering), owner of the declaration: European Producers of Laminate Flooring e.V. (EPLF), decl. no. EPD-EPL-20210138-CBE1-ENLaminate: the use class decides, not the thickness
Egger, a maker of laminate, says the thickness of a laminate or multilayer modular floor is not decisive for its suitability; what matters is the correct use class for the area. It makes laminate from 6 to 12 mm, and warns that an underlay that is too thick can harm the click joints and the efficiency of underfloor heating.
“For the suitability and use of multi-layer modular flooring (MMFA, EN 16511) and laminate flooring (EPLF, EN 13329) in the respective area of application, the thickness or gauge of the flooring is not decisive. It is important that the floor covering chosen has the correct stress class, which is approved and recommended for this area. EGGER produces laminate flooring and multi-layer modular floor coverings in thicknesses ranging from 6 to 12 mm. … If the impact sound underlay is too thick and not sufficiently pressure-resistant, this can have a detrimental effect on the durability / fitting accuracy of the click connections and also on the efficiency of the underfloor heating.”
Source: EGGER Flooring - FAQs, questions and answers (web page)Wear layer thickness classes for vinyl
EN ISO 10582 does not link heterogeneous PVC floor coverings to a wear layer thickness in millimetres per class. Its published scope states that the standard specifies the characteristics of non-cushioned heterogeneous PVC floor coverings and that it includes a classification system (see ISO 10874) based on the intensity of use, plus requirements for marking - so the class number (23, 31, 32, 33, 34) describes where a floor is fit to be used, not how thick its wear layer is.
| Basis of the classification system referenced by EN ISO 10582 (ISO 10874) | intensity of use |
|---|
“To encourage the consumer to make an informed choice, this document includes a classification system (see ISO 10874) based on the intensity of use, which shows where these floor coverings give satisfactory service. It also specifies requirements for marking.”
Source: ISO 10582:2017 - Resilient floor coverings - Heterogeneous poly(vinyl chloride) floor covering - Specifications (ISO catalogue page, abstract)What SPC rigid core actually is
According to the Multilayer Modular Flooring Association, SPC stands for Solid Polymer Core, whereas WPC stands for Wood Plastic Composite; both are listed as alternative core-layer materials for multilayer modular floor panels, the SPC core being a solid polymer compound and the WPC core a wood-polymer composite.
| SPC | Solid Polymer Core |
|---|---|
| WPC | Wood Plastic Composite |
| EPC | Expanded Polymer Core |
“Core layers can be wood composites such as HDF or cork, but also polymer or polymer composite materials such as PFC (Perfluorcarbone), natural fibre-reinforced plastics, WPC (Wood Plastic Composite), EPC (Expanded Polymer Core) and SPC (Solid Polymer Core); but also mineral-based substrates, e.g. MPC ("Mineral Plastic Composites").”
Source: Multilayer Modular Flooring in focus - MMFA (Multilayer Modular Flooring Association)Installation and care
The steps a warranty usually depends on.
Acclimatisation before fitting
The Contract Flooring Association's guide asks for a steady room temperature of 18 to 27 °C, reached 48 hours before installation, so that the flooring can be kept in the room and reach room temperature before it is laid.
| conditioning before installation | 48 h |
|---|
“They also advise that this temperature should be attained 48 hours prior to the installation, so that floorings can be kept in the room and brought to room temperature (acclimatised) before installation.”
Source: CFA Guide to Contract Flooring - Contract Flooring AssociationRoom conditions at the time of fitting
The MMFA, the European association for multilayer modular floor coverings, requires the flooring to acclimatise for at least 48 hours in the same conditions as the installation area, stored flat and cross-stacked in unopened boxes at roughly 15-25 degrees Celsius and 35 to 65 per cent relative humidity.
| acclimatisation before installation | at least 48 h |
|---|---|
| storage and acclimatisation temperature | 15-25 °C |
| storage and acclimatisation relative humidity | 35-65 % |
“Leave the floor covering to acclimatise in the same environmental conditions as the installation area for a period of at least 48 hours prior to installation. Always store the boards flat and cross-stacked, in their original unopened boxes and at approx. 15-25 °C and between 35 % and maximum 65 % relative humidity.”
Source: Prior to installation — MMFA (Multilayer Modular Flooring Association)The expansion gap
The EPLF, the European association of laminate flooring producers, recommends an edge gap of 8 mm to 12 mm on all sides of a floating floor, so that the covering can expand and contract without lifting.
| recommended edge gap on all sides | 8 to 12 mm |
|---|
“To accommodate such changes, a edge spacing should be observed on all sides. A free space of 8 mm to 12 mm is recommended.”
Source: EPLF Technical Bulletin — Installation of Laminate Floor Coverings (06/2022), 6.4 Edge gapsFloating or glued down
Yes. The EPLF, the association of European laminate flooring producers, states in its technical bulletin on installation that laminate floor coverings are by conception intended for floating installation, and that a full-surface adhesive bond is an exception used only under special circumstances, for example at the specific request of the client. Before bonding a laminate floor over its full surface, installers are urged to contact the manufacturer or supplier to establish whether the product is suitable or approved for that type of installation.
| laminate floor coverings – method by design | floating installation |
|---|---|
| full-surface adhesive bond | exception, only under special circumstances and after checking suitability/approval with the manufacturer |
“Under special circumstances, for example at the specific request of the client, it may be necessary to install laminate floor coverings using a full-surface adhesive bond, despite the fact that by conception laminate floor coverings are intended for floating installation.”
Source: EPLF Technical Bulletin – Installation of Laminate Floor Coverings (English edition 06/2022), European Producers of Laminate FlooringWhat an underlay is actually for
The MMFA groups the benefits of an underlay under floating multilayer modular flooring into three headings: ensuring a satisfactory installation by levelling unevenness, permanently protecting the floor against wear and against rising residual building moisture, and improving the floor's properties in terms of impact sound, walking noise, heat insulation and walking comfort.
“The requirements for suitable underlays are aimed at protecting the floor from daily wear and tear such as falling objects and walking, as well as shielding the floor from rising residual building moisture or damp.”
Source: Underlays — MMFA (Multilayer Modular Flooring Association)Cutting waste — how much extra to order
There is no published industry standard for cutting waste; the figures come from manufacturers' own guidance and they vary. Havwoods advises 8-12 % wastage for planks and 15-20 % for patterned floors such as herringbone or chevron. Quick-Step's UK guidance for laminate is 5 % extra in a regular room and 10 % in a room with many angles or curves.
| Wastage allowance, plank floors (Havwoods UK) | 8-12 % |
|---|---|
| Wastage allowance, herringbone or chevron (Havwoods UK) | 15-20 % |
| Extra to order, regular room, laminate (Quick-Step UK) | 5 % |
| Extra to order, room with many angles or curves, laminate (Quick-Step UK) | 10 % |
“For planks we typically advise on 8-12% wastage and patterned floors, such as herringbone or chevron, may need 15-20% wastage.”
Source: Havwoods UK - FAQs: How Much Wastage Shall I Encounter For? · second sourceHow often a wood floor can be sanded
No trade-association or standards source found puts a number on how often an engineered wood floor can be sanded; the only sourced figure comes from a manufacturer, Kährs, which says engineered floors can be sanded up to four times depending on wear-layer thickness.
| sanding cycles, engineered wood floor (manufacturer statement) | up to 4 times |
|---|
“Depending on the thickness of the wear layer, they can be sanded up to four times, extending their lifespan significantly.”
Source: FAQ about flooring - KährsCleaning — the manufacturers’ own guidance
For multilayer modular floor coverings the MMFA requires low-moisture cleaning methods and states that pooling of liquid on the floor must be avoided under all circumstances.
“Absolutely avoid ponding in any case!”
Source: Basic cleaning — MMFA (Multilayer Modular Flooring Association)Engineered wood can be refinished, less often than solid
The US National Wood Flooring Association says engineered wood floors are real wood in multiple layers with a top layer of high-quality wood, and that they can be sanded and refinished, but not as many times as solid wood flooring.
“Engineered wood floors are also made of real wood, but include multiple layers, with the top layer made of high-quality wood. … While this type of flooring can be sanded and refinished, it cannot be done as many times as solid wood flooring.”
Source: Types of Wood Floors - woodfloors.org, consumer site of the National Wood Flooring Association (NWFA), 10 October 2023The wear layer below which a floor is not sanded
According to the US National Wood Flooring Association, its Sand and Finish Guidelines say that, in general, a floor with a wear thickness of less than 3/32 inch should not be sanded, and its refinishable programme asks a factory-finished smooth engineered floor for a wear layer of at least 2.5 mm (3/32 inch).
| Minimum wear layer, factory-finished smooth engineered floor (NWFA refinishable programme) | 2.5 mm |
|---|
“• Factory Finished Smooth Wood Flooring: 2.5 mm (3/32”) … the NWFA Wood Flooring Sand and Finish Guidelines state that, in general, if the wear thickness is less than 3/32”, the floor should not be sanded.”
Source: NWFA Launches Engineered Wood Flooring Refinishable Program, by John Forbes, NWFA - Hardwood Floors magazine (published by the National Wood Flooring Association), August/September 2022Wood blocks in herringbone: glued, handed, set out from the centre
The Contract Flooring Association says solid wood blocks are usually glued to the subfloor with bitumen or polymer adhesives, are often made in left-hand and right-hand versions so that they interlock in herringbone and similar patterns, and are set out with the first two lines laid either side of an approximate centre line, working outwards to a border of longitudinally placed blocks plus an expansion gap.
“Solid wood block flooring may be laid over any sound, dry, level subfloor and is usually glued to the subfloor using bitumen or polymer adhesives. … They will often be manufactured in left hand and right-handed versions to allow them to interlock properly when laid in herringbone and similar patterns. … The first two lines of blocks should be laid on either side of an approximate centre line and should then continue outwards until a space is left for a border of longitudinally placed blocks plus an expansion gap.”
Source: CFA Guide to Contract Flooring - Contract Flooring Association (8th edition, correct as of 17 June 2022), section "Solid wood blocks"Herringbone: from the centre line, not floated
Ted Todd, a UK maker of wood floors, sets out its herringbone floors from the centre line of the space, laying down that line and working out to the perimeter, and does not recommend floating installation for herringbone because gaps between the elements are hard to avoid if the pattern runs out.
“We do not recommend floating installation for Herringbone as it can be difficult to avoid gaps between elements if the patterns run-out. … The standard approach is for the centre line in the space to be the starting point, with the floor installed down this line and then working out to the perimeter.”
Source: Ted Todd Installation Guide, Chapter 7 "Herringbone - Fully Bonded" (version updated 09/2024), PDF linked from tedtodd.co.uk/documentsClick LVT: a floating floor with expansion gaps
The Contract Flooring Association says click LVT planks lock together to form a large floating floor, so correct expansion gaps are needed at the perimeters and around fixed items, and that in areas of high traffic full bonding is sometimes recommended to avoid excessive movement.
“The planks lock together to form a large floating floor, therefore correct expansion gaps should be left at perimeters and around all fixed items to allow movement especially in areas of temperature change. In areas of high traffic sometimes full bonding is sometimes recommended to avoid excessive movements and resulting faults.”
Source: CFA Guide to Contract Flooring - Contract Flooring Association (8th edition, correct as of 17 June 2022), section "Resilient flooring", click LVTMultilayer modular floors: floating, with a gap per metre
The MMFA, the European association for multilayer modular floor coverings, says these floors expand and contract with temperature and humidity and should therefore only be laid as a floating installation, with an expansion gap of at least 1.5 mm per running metre of floor on each side of the room as a rule of thumb.
| Expansion gap per running metre of floor, each side (rule of thumb) | 1.5 mm |
|---|
“As MMF floor coverings expand and contract due to changes in ambient temperature or humidity conditions, the flooring should only be laid as a floating installation. … As a rule of thumb: create an expansion gap of min. 1.5 mm per running meter of flooring on each side of the room (e.g. room width 5 m = 8 mm border joint on each side).”
Source: TB 2 - MMFA Technical bulletin 12/2023 - Installation of Multilayer Modular Floor Coverings (English Edition 12/2023), Multilayer Modular Flooring AssociationGlue-down LVT: a smooth base and no expansion gap
Amtico, a maker of LVT, says for its adhesive-bonded ranges that any irregularities in the subfloor will show through the finished floor, and that no expansion gap or silicone sealant is needed.
“Any irregularities in the subfloor will show through the finished floor. … with all our adhesive bonded ranges an expansion gap or silicone sealant is not needed.”
Source: Amtico LVT Installation Guidelines DES-IN-20250218-08-EN (Signature, Signature Safety, Form, Spacia, Spacia Safety and First)Preventing scratches: glides, shoes, claws, grit
The US National Wood Flooring Association advises fabric-faced glides under furniture legs to prevent scuffing and scratching, avoiding cleats, sports shoes and high heels, keeping pet claws trimmed, and notes that particles can be ground into a floor and damage its finish.
“Put fabric-faced glides under the legs of furniture to prevent scuffing and scratching. … Avoid walking on wood floors with cleats, sports shoes, and high heels. 3. Keep pet claws trimmed and in good repair. … Particles have the potential to be ground into floors potentially causing damage to a floor’s finish.”
Source: NWFA Wood Flooring Installation Guidelines, Revised 2025 - National Wood Flooring Association, maintenance chapter, general protectionMost scratches are in the finish
The US National Wood Flooring Association says most scratches in a wood floor are in the finish, not the wood, and that a professional may be able to lightly abrade the finish and apply a new coat; it also recommends breathable rugs at all doors to keep grit out.
“placing breathable rugs at all doors will minimize dirt and debris from being tracked inside and help protect your floor from scratches. … Most scratches in wood flooring will occur in the finish, not the wood itself. A professional may be able to lightly abrade the finish and apply a new coat to restore the floor.”
Source: Homeowner's Handbook to Real Wood Floors - National Wood Flooring Association (PDF, 2019)Deep scratches: when a full sand and refinish is due
The US National Wood Flooring Association recommends a complete sand and refinish when a wood floor has damage such as deep scratches or dents, or when the finish has worn away.
“A complete sand and refinish is recommended when there is damage to the wood floor like deep scratches, dents, and other flooring damage. It is also recommended when the finish has worn away,”
Source: Refinishing Your Floors - woodfloors.org, consumer site of the National Wood Flooring Association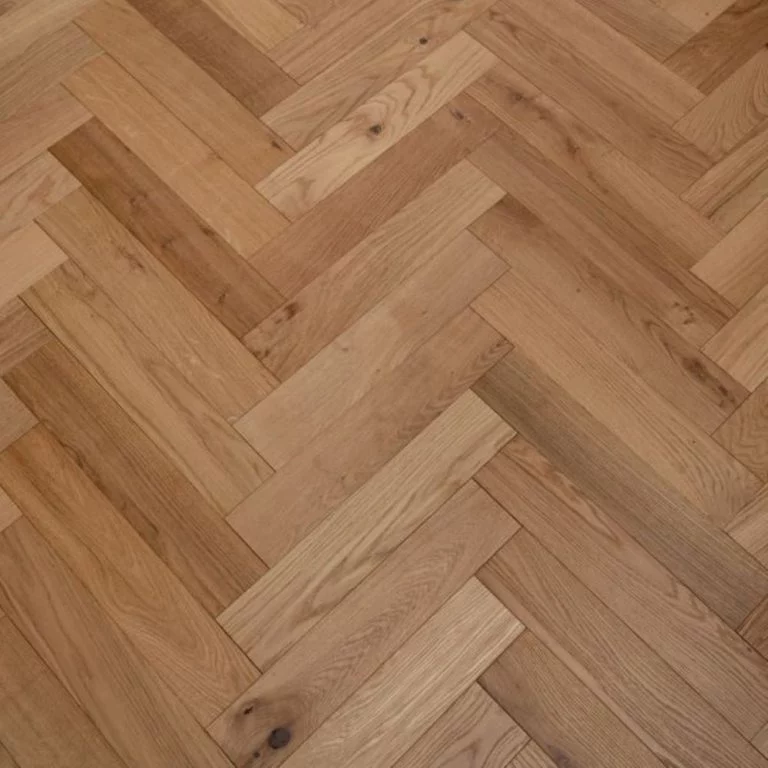
Underfloor heating
Temperature limits, thermal resistance and the commissioning sequence.
BS EN 1264 — water-based underfloor heating
BS EN 1264 covers water based surface embedded heating and cooling systems in five parts: definitions and symbols (Part 1), determination of the thermal output (Part 2), dimensioning (Part 3), installation (Part 4), and determination of the thermal output for surfaces embedded in floors, ceilings and walls (Part 5).
| Part 1 | Definitions and symbols |
|---|---|
| Part 2 | Determination of the thermal output |
| Part 3 | Dimensioning |
| Part 4 | Installation |
| Part 5 | Heating and cooling surfaces embedded in floors, ceilings and walls. Determination of the thermal output |
“Part 1 Floor heating. Systems and components. Definitions and symbols Part 2 Floor heating. Systems and components. Determination of the thermal output Part 3 Floor heating. Systems and components. Dimensioning Part 4 Floor heating. Systems and components. Installation Part 5 Water based surface embedded heating and cooling systems. Heating and cooling surfaces embedded in floors, ceilings and walls. Determination of the thermal output”
Source: BS EN 1264 — Water based surface embedded heating and cooling systems (BSI series landing page)Maximum floor surface temperature
EN 1264 caps the floor surface temperature at 29 °C in the occupied area, 35 °C in the edge (perimeter) zone and 33 °C in bathrooms.
| occupied area | 29 °C |
|---|---|
| edge zone | 35 °C |
| bathrooms | 33 °C |
“Max. surface temperatures in DIN EN 1264: • 29 °C in the occupied area • 35 °C in the edge zone • 33 °C in bathrooms”
Source: Uponor underfloor heating/cooling — Planning information (Technical Information TI-1186660)Thermal resistance of the floor covering
Floor coverings over a warm water underfloor heating system are normally limited to a thermal resistance of R(λ,B) ≤ 0.15 m2K/W; Uponor, for one, designs its systems in dwellings for that worst case.
| maximum thermal resistance of floor covering (R lambda,B) | 0.15 m2K/W |
|---|
“The following types of floor coverings can be laid on Uponor surface heating/cooling systems if a maximum thermal resistivity of Rλ,B ≤ 0,15 m²K/W is observed and approved by the manufacturer”
Source: Uponor underfloor heating/cooling — Planning information (Technical Information TI-1186660)Tog and m²K/W — the same quantity, two scales
One tog equals 0.1 m2K/W, so a tog value is divided by 10 to give thermal resistance in m2K/W.
| 1 tog | 0.1 m2K/W |
|---|---|
| 1 RSI | 1 m2K/W |
“The basic unit of insulation coefficient is the RSI, which is equal to 1m²K/W. One tog is one tenth of one RSI, therefore one tog is 0.1m²K/W”
Source: CFA Guidance Document — Beyond Installation: Guidance on Underfloor Heating (Contract Flooring Association)Wood over underfloor heating
UK trade-association guidance sets no blanket ban on wood over underfloor heating but ties it to a temperature limit, noting that some hardwood floor finishes are installed with a maximum floor surface temperature of 27 °C.
| maximum floor surface temperature for some hardwood finishes | 27 °C |
|---|
“For example, some hardwood floor finishes are installed with a maximum floor surface temperature of 27°C.”
Source: CFA Guidance Document — Beyond Installation: Guidance on Underfloor Heating (Contract Flooring Association)Commissioning the heating before the floor goes down
Before any subfloor preparation or floorcovering is laid, the underfloor heating must be run through a full drying and commissioning cycle of heating up and cooling down, typically lasting about 21 days.
| typical duration of the heat-up / cool-down commissioning cycle | 21 days |
|---|
“In all instances, UFH systems must be run through a full drying / commissioning cycle of heating up and cooling down before any subfloor preparation or installation of decorative floor coverings are installed. This period of commissioning is usually around 21 days.”
Source: CFA Guidance Document — Beyond Installation: Guidance on Underfloor Heating (Contract Flooring Association)Floor surface temperature: what most manufacturers state
The UK underfloor heating trade association says, in its section on linoleum and vinyl, that most manufacturers state a maximum floor surface temperature of 27 °C, which is more than adequate in the majority of situations.
| maximum floor surface temperature stated by most manufacturers | 27 °C |
|---|
“Most manufacturers state 27°C, which is more than adequate in the majority of situations.”
Source: BEAMA Underfloor Heating — Choosing your floor covering to maximise your underfloor heating efficiency (April 2020)Vinyl over underfloor heating: 26 °C
BEAMA advises that most vinyls should not be heated above 26 °C, so the floor temperature should be restricted, and warns that in rooms with high heat losses such as conservatories a restricted floor temperature may not heat the room sufficiently.
| maximum temperature for most vinyls | 26 °C |
|---|
“However, as most vinyls should not be heated to above 26°C, the floor temperature should be restricted. Care should be taken in the design of systems in rooms with high heat losses, such as conservatories, as it may not be possible to sufficiently heat the room with a restricted floor temperature limit.”
Source: BEAMA Underfloor Heating — Choosing your floor covering to maximise your underfloor heating efficiency (April 2020)Engineered boards under 20 mm over joists or battens
Unless installed over a screeded slab, engineered boards of less than 20 mm thickness should, according to BEAMA, be supported and fixed to an additional decking material for structural support, unless the manufacturer specifically states otherwise.
| board thickness below which extra decking is advised (not over a screed) | 20 mm |
|---|
“Unless installed over a screeded slab, engineered boards of less than 20mm thickness should be supported and fixed to an additional decking material to lend suitable structural support unless specifically stated”
Source: BEAMA Underfloor Heating — Choosing your floor covering to maximise your underfloor heating efficiency (April 2020)Parquet over underfloor heating: glued down, with a floor sensor
BEAMA describes parquet as suitable for underfloor heating, with the blocks continuously glued onto the screed or timber deck for good heat transfer and a floor temperature sensor always fitted.
“Parquet – Also suitable for use with underfloor heating, these floor blocks should be continuously glued onto the screed or timber deck for good heat transfer. A floor temperature sensor should always be fitted.”
Source: BEAMA Underfloor Heating — Choosing your floor covering to maximise your underfloor heating efficiency (April 2020)Carpet and underlay: the 2.5 tog ceiling
Most carpets are suitable for water-based underfloor heating as long as the total tog of all materials, including any underlay, does not exceed 2.5 tog.
| maximum total tog of carpet and underlay | 2.5 tog |
|---|
“most carpets are suitable for use with wwUFH as long as the total tog of all materials, including any underlays, does not exceed 2.5 tog.”
Source: BEAMA Underfloor Heating — Choosing your floor covering to maximise your underfloor heating efficiency (April 2020)Stone and ceramic tiles: the best conductor
BEAMA calls natural stone and ceramics the best floor material for water-based underfloor heating, says a thicker tile has little effect on heat output but slightly lengthens the heat-up time, and lists 15 mm stone tiles at a thermal resistance of 0.004 m2K/W.
| thermal resistance of 15 mm stone tiles | 0.004 m2K/W |
|---|---|
| tog value of 15 mm stone tiles | 0.04 tog |
“This high-density material is the best floor material to use with wwUFH, allowing the heat from the pipework to easily flow to the rest of the room, with excellent heat transfer properties. Increasing the thickness of the tile will have little effect on the heat output, but it will slightly increase the heat up time. … 15mm Stone Tiles 3.5 0.004 0.04”
Source: BEAMA Underfloor Heating — Choosing your floor covering to maximise your underfloor heating efficiency (April 2020)Tiles over underfloor heating: decoupling membrane and flexible adhesive
With stone, slate and ceramic tiles over underfloor heating, BEAMA advises always using a decoupling membrane and flexible adhesive to reduce the risk of hairline expansion cracks.
“With stone (which includes slate) and ceramic tiles, it is always advisable to use a de-coupling membrane and flexible adhesive to reduce the potential for any hairline expansion cracks.”
Source: BEAMA Underfloor Heating — Choosing your floor covering to maximise your underfloor heating efficiency (April 2020)Thermal resistance of wood boards by thickness
Junckers gives the thermal resistance of its wood floorboards as 0.08 m2K/W at 14 mm, 0.09 at 15 mm, 0.12 at 20.5 mm and 0.13 at 22 mm, adds the underlay to the board, and works the example of a 14 mm board on its PolyFoam underlay (0.07) to a total of 0.15 m2K/W.
| 14 mm floorboards | 0.08 m2K/W |
|---|---|
| 15 mm floorboards | 0.09 m2K/W |
| 20.5 mm floorboards | 0.12 m2K/W |
| 22 mm floorboards | 0.13 m2K/W |
| Junckers PolyFoam underlay | 0.07 m2K/W |
| Junckers Foam underlay | 0.04 m2K/W |
“22 mm floorboards: 0.13 20.5 mm floorboards: 0.12 15 mm floorboards: 0.09 14 mm floorboards: 0.08 Intermediate layer: Junckers PolyFoam, incl. extra 0.20 mm PE membrane: 0.07 Junckers Foam: 0.04 … Example: 14 mm clip system laid on PolyFoam, the total insulation is: md = 0.08 + 0.07 = 0.15 m² °K/W.”
Source: Junckers — Underfloor Heating, General Information (technical data sheet E 4.0)Wood over underfloor heating: 27 °C on the surface, 35 to 45 °C in the pipes
Junckers says the surface of the boards should not exceed 27 °C and the heating must be adjusted accordingly, and that the flow temperature will normally lie between 35 and 45 °C.
| maximum surface temperature of the boards | 27 °C |
|---|---|
| normal flow temperature | 35-45 °C |
“The temperature on the surface of the boards should not exceed 27 °C and the system must be adjusted accordingly. … The flow temperature will normally lie between 35 and 45 °C.”
Source: Junckers — Underfloor Heating, General Information (technical data sheet E 4.0)Wood over underfloor heating: wider gaps in the heating season
Junckers notes that wood contracts when heated from below, so larger gaps than normal form between boards in the heating season, and larger still under low furniture and well-insulating rugs, where the floor runs warmer.
“Wood is a living material. Wood will contract when heated from an underfloor heating system and during the heating season larger board gaps than normal will form between the boards. The floor temperature under e.g. low bookcases and carpets with good heat insulation properties will be higher than for the rest of the floor, so that larger gaps can be expected in these areas.”
Source: Junckers — Underfloor Heating, General Information (technical data sheet E 4.0)Laminate over underfloor heating: one manufacturer's rules
Quick-Step allows its laminate over low-temperature underfloor heating or cooling with a maximum contact temperature of 27 °C and a total thermal resistance of no more than 0.15 m2K/W, always floating, and excludes its Thermolevel underlay.
| maximum contact temperature | 27 °C |
|---|---|
| maximum total thermal resistance | 0.15 m2K/W |
“This means that the maximum permitted contact temperature (= contact surface of the floor with the feet) is 27°C. … Please ensure that the total thermal resistance does not exceed 0.15 m² K/W. … make sure that the laminate is always installed floating.”
Source: Quick-Step — Can I use Quick-Step laminate in combination with underfloor heating? (FAQ)Functional heating of a heated screed
IMI's commissioning instructions start functional heating of a heated screed no earlier than 21 days after laying for cement screed and 7 days for anhydrite, at 20 to 25 °C flow temperature for 3 days and then at the maximum design temperature for 4 days, in keeping with EN 1264-4, and state that functional heating does not ensure the screed is dry enough to be covered; that readiness is checked by the floor layer.
| earliest start, cement screed | 21 days |
|---|---|
| earliest start, anhydrite screed | 7 days |
| first stage flow temperature | 20-25 °C |
| first stage duration | 3 days |
| second stage at maximum design temperature | 4 days |
“Carry out functional heating of heating screed conforming to standards in keeping with EN 1264-4. Earliest start for functional heating: – Cement screed: 21 days after laying – Anhydrite screed 7 days after laying Begin 20 °C - 25 °C flow temperature and maintain for 3 days. Then set maximum design temperature and maintain for 4 days. … Functional heating does not ensure that the screed has reached moisture content for readiness for covering. The readiness for covering the floor will be checked by the floor layer.”
Source: IMI Hydronic Engineering — Commissioning instructions for underfloor heating (9340-00.831-480, Index 00, 04.2021)Engineered timber over underfloor heating: floating or nailed
BEAMA, the UK underfloor heating trade association, describes engineered timber as a more stable option than solid timber because it is cross-laminated, so that its moisture content is less critical, and says it can be laid directly over underfloor heating as a floating floor or nailed into battens or joists.
“Engineered timber – A more stable option than solid timber, due to being cross-laminated, its moisture content is less critical. It can be laid directly over the underfloor heating as a ‘floating floor’ or nailed into battens or joists.”
Source: BEAMA Underfloor Heating — Choosing your floor covering to maximise your underfloor heating efficiency (April 2020)
Your rights, pricing and sourcing
The consumer law that applies to a flooring order, and the timber rules behind it.
Consumer Rights Act 2015 — goods must be of satisfactory quality
The Consumer Rights Act 2015 treats every consumer contract to supply goods as including a term that the quality of the goods is satisfactory, measured against what a reasonable person would consider satisfactory taking account of the description, the price and all other relevant circumstances. The Act names fitness for all the purposes for which goods of that kind are usually supplied, appearance and finish, freedom from minor defects, safety and durability as aspects of quality.
| aspect of quality (s.9(3)(a)) | fitness for all the purposes for which goods of that kind are usually supplied |
|---|---|
| aspect of quality (s.9(3)(b)) | appearance and finish |
| aspect of quality (s.9(3)(c)) | freedom from minor defects |
| aspect of quality (s.9(3)(d)) | safety |
| aspect of quality (s.9(3)(e)) | durability |
“(3)The quality of goods includes their state and condition; and the following aspects (among others) are in appropriate cases aspects of the quality of goods— (a)fitness for all the purposes for which goods of that kind are usually supplied; (b)appearance and finish; (c)freedom from minor defects; (d)safety; (e)durability.”
Source: Consumer Rights Act 2015, section 9 (Goods to be of satisfactory quality), subsection (3)Consumer Rights Act 2015 — the short-term right to reject
Under the Consumer Rights Act 2015 a consumer whose goods do not conform has a short-term right to reject, a right to repair or replacement, and a right to a price reduction or a final right to reject. The time limit for the short-term right to reject is 30 days beginning with the day after transfer of ownership, delivery and any trader installation have all taken place.
| short-term right to reject | 30 days |
|---|
“(3)The time limit for exercising the short-term right to reject (unless subsection (4) applies) is the end of 30 days beginning with the first day after these have all happened— (a)ownership or (in the case of a contract for the hire of goods, a hire-purchase agreement or a conditional sales contract) possession of the goods has been transferred to the consumer, (b)the goods have been delivered, and (c)where the contract requires the trader to install the goods or take other action to enable the consumer to use them, the trader has notified the consumer that the action has been taken.”
Source: Consumer Rights Act 2015, section 22 (Time limit for short-term right to reject), subsection (3)Consumer Contracts Regulations 2013 — cancellation period
For goods bought at a distance the Consumer Contracts (Information, Cancellation and Additional Charges) Regulations 2013 give a cancellation period ending 14 days after the day the goods come into the physical possession of the consumer or of a person identified by the consumer, other than the carrier. Where several goods ordered together are delivered on different days, the 14 days run from the day the last of them is received.
| normal cancellation period, sales contract | 14 days |
|---|---|
| start of period | day after the goods come into the physical possession of the consumer |
“(3) If the contract is a sales contract and none of paragraphs (4) to (6) applies, the cancellation period ends at the end of 14 days after the day on which the goods come into the physical possession of— (a) the consumer, or (b) a person, other than the carrier, identified by the consumer to take possession of them.”
Source: The Consumer Contracts (Information, Cancellation and Additional Charges) Regulations 2013, regulation 30 (Normal cancellation period), paragraph (3)Consumer Contracts Regulations 2013 — the bespoke exception
Yes. Regulation 28 of the Consumer Contracts (Information, Cancellation and Additional Charges) Regulations 2013 disapplies Part 3, which contains the right to cancel, for the supply of goods made to the consumer's specifications or clearly personalised, so cut-to-size or made-to-measure flooring falls outside the 14-day cancellation right.
| exception | goods made to the consumer's specifications or clearly personalised |
|---|---|
| location | regulation 28(1)(b) |
“(b) the supply of goods that are made to the consumer's specifications or are clearly personalised;”
Source: The Consumer Contracts (Information, Cancellation and Additional Charges) Regulations 2013, regulation 28 (Limits of application: circumstances excluding cancellation), paragraph (1)(b)DMCC Act 2024 — drip pricing
Section 230 of the Digital Markets, Competition and Consumers Act 2024 makes the total price of a product material information that must be given in an invitation to purchase, and defines that total price as including any fees, taxes, charges or other payments the consumer will necessarily incur. Where part of the price cannot reasonably be calculated in advance, the trader must instead say how it will be calculated.
| legal basis | DMCCA 2024, section 230 |
|---|---|
| rule | total price must include any fees, taxes, charges or other payments necessarily incurred |
“(4) For the purposes of subsection (2)(b) the total price of a product includes any fees, taxes, charges or other payments that the consumer will necessarily incur if the consumer purchases the product.”
Source: Digital Markets, Competition and Consumers Act 2024, section 230 (Omission of material information from invitation to purchase), subsection (4)DMCC Act 2024 — fake and incentivised reviews
Beyond submitting or commissioning fake or concealed-incentivised reviews (Sch. 20 para 13(1)), paragraph 13 of Schedule 20 to the Digital Markets, Competition and Consumers Act 2024 also lists two further practices: publishing consumer reviews or consumer review information in a misleading way (para 13(2)), and publishing consumer reviews or consumer review information without taking such reasonable and proportionate steps as are necessary to prevent the publication of fake, concealed-incentivised or false or misleading reviews and to remove them from publication (para 13(3)). Enforcement is a duty of every local weights and measures authority in Great Britain (Trading Standards) under s.231(1), and the CMA may also enforce the provisions of the Chapter under s.231(3).
| Sch. 20 para 13(2) | Publishing consumer reviews, or consumer review information, in a misleading way. |
|---|---|
| Sch. 20 para 13(3) | Publishing consumer reviews, or consumer review information, without taking such reasonable and proportionate steps as are necessary for the purposes of preventing the publication of, and removing, fake or incentivised or false or misleading reviews |
| enforcers | local weights and measures authorities; CMA |
“(2)Publishing consumer reviews, or consumer review information, in a misleading way. (3)Publishing consumer reviews, or consumer review information, without taking such reasonable and proportionate steps as are necessary for the purposes of— (a)preventing the publication of— (i)fake consumer reviews, (ii)consumer reviews that conceal the fact they have been incentivised, or (iii)consumer review information that is false or misleading, and (b)removing any such reviews or information from publication.”
Source: Digital Markets, Competition and Consumers Act 2024, Schedule 20: Commercial practices which are in all circumstances considered unfair · second sourceA guarantee is in addition to your legal rights
Section 30 of the Consumer Rights Act 2015 requires a goods guarantee to state that the consumer has statutory rights in relation to the goods and that those rights are not affected by the guarantee, so a manufacturer's guarantee sits alongside statutory rights rather than replacing them.
“the guarantee states that the consumer has statutory rights in relation to the goods and that those rights are not affected by the guarantee”
Source: Consumer Rights Act 2015, section 30: Goods under guarantee — legislation.gov.ukTimber Regulation — due diligence on where the wood came from
Anyone who places timber or timber products on the UK market for the first time is an operator and must exercise due diligence under the assimilated Regulation (EU) No 995/2010, known as the UK Timber Regulation; placing illegally harvested timber on the market is prohibited. The due diligence system required by Article 6 has three elements: access to information on the supply, risk assessment, and risk mitigation unless the identified risk is negligible.
| legal basis | Regulation (EU) No 995/2010, Article 4 (UK assimilated law) |
|---|---|
| due diligence element 1 | access to information (Art. 6(1)(a)) |
| due diligence element 2 | risk assessment procedures (Art. 6(1)(b)) |
| due diligence element 3 | risk mitigation procedures unless risk is negligible (Art. 6(1)(c)) |
“The placing on the market of illegally harvested timber or timber products derived from such timber shall be prohibited.”
Source: Regulation (EU) No 995/2010 (assimilated), Article 4 - Obligations of operators · second sourceFSC and PEFC — what the labels mean
A chain of custody certificate confirms that the company controls certified material along the supply chain: that it sources from certified forests, recycled or controlled sources and follows the scheme's procedures through production and distribution. It does not mean that every product that company makes contains certified material — only products carrying the on-product label or claim do.
| what it certifies | control of certified material through production and supply chain |
|---|---|
| what it does not certify | that all products of the certified company contain certified material |
“This certification proves it is sourcing materials from FSC-certified forests, recycling and/or controlled sources and is following FSC-defined best practice throughout the production process and supply chain. But it does not mean that all products they produce are comprised of these materials.”
Source: Forest Stewardship Council — What do the FSC labels mean? (chain of custody certification)111 entries shown. See also the flooring types and the glossary.